First and foremost. Before you report anyone for imagery theft, make sure that you are 100% sure the image you report is YOURS. Nuances, like different lens, lights on buildings are different, or other objects and people of the images are different. Wrongly accusing someone of theft can be used against you and you may be sued for defamation!!
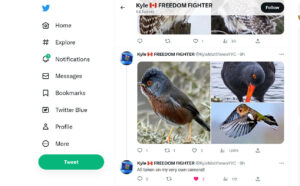
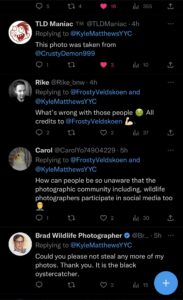 Being on social media and publishing and sharing your work helps to get you noticed and sometimes become famous. Having a lot of followers with lots of likes and sharing your images makes you feel good. However, there is also a downside sharing your work. It doesn’t matter if you put a watermark as there are people with bad intentions out there. I came across an issue where a photographer started a discussion on sharing photos without giving credit to the photographer on Twitter. The perpetrator in question not only misappropriated images, but also cropped photos so that AI Image search services would not find the photos and also removed watermarks. After doing a deep dive into this, I noticed that the Twitter profile in question stole many photos, telling these were all the thief’s own photos, taken in Vancouver, Canada. The problem was, that some of the birds probably don’t even exist in Canada (one photo apparently taken in Canada was actually taken in Scotland by a well known Wildlife photographer. You cannot make this s#it up!
In this particular case, someone wanted to cause damage to a photographer by impersonating them. This is a very bad thing to do. I am not sure if the perpetrator was identified and caught, but as you can see, we live in a clown world today.
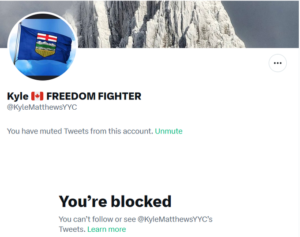 Once you call the individuals out, they will most likely block you and continue their shenanigans with the same account or setup another social media account. Oftentimes they also use the name of well established photographers and impersonate them. They may even want to defraud innocent people into buying the stolen photos to make a quick buck or two. Never purchase anything from unknown people until you did a thorough background check and also talked with the artist personally over the phone (Zoom / Google meet).
Fortunately, you are not alone and your fellow photographers will most likely give you a heads up if they see your work being ‘stolen’ by others. You may be able to hire a lawyer and submit a Cease and Desist Letter to the person committing a Copyright Infringement, but with Twitter allowing anonymous accounts, may be difficult and costly to do. Probably best to report the infringement to the Social Media operator and have the account committing the Copyright infringement terminated. The perpetrators will most likely setup another account and start the scheme all over again.
One thing you can do is to be vigilant and use tools like images.google.com and/or TinEye.com To be honest, TinEye doesn’t work great for me and I had more luck finding copyright infringement cases via images.google.com
 I hope this article was somehow helpful and gives you some insight on the issues that can arise when you upload your photos on social media. In some cases, your photos can be used for nefarious causes and get you into troubles as you are the copyright owner of the photo, especially if you share photos with recognizable people and/or property. Just be vigilant and careful with what you share. For covering you from a legal side, you can see if the “Contracts & Forms Bundle for Photographers” works for you. (sponsored link).

Fortunately, this episode had a happy ending as of the writing of this article, the account of the perpetrator has been deleted.
Please make sure that you are 100% sure that your imagery has been misused before you report anyone. This happened to me. I posted a picture I was proud of on 500px. Shortly after posting it, a fellow photographer I have been following for 10 years contacted me to remove HIS photo immediately. We discussed the issue and came to the conclusion, that we were at the same event at the same time and took the same picture. We were standing next to each other without knowing each other personally.
Be your own judge. I took the image on the left with my Nikon D5300, 55-300mm lens. Scott, the other photographer took the photo on the right with this, I believe D500, 150-600mm Tamron gear.
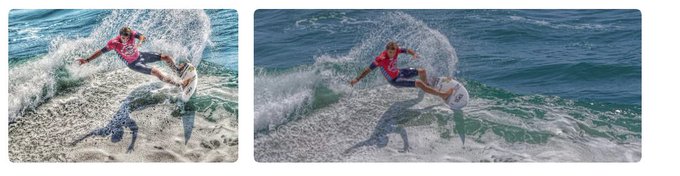
The subtle nuance of the surfers posture and EXIF information cleared up the situation and there was no need to block or shame each other. Some photographers may not take it lightly if accused by mistake and file a defamation lawsuit against you.
In addition to my 5 cents, you can read the below article found on Contrastly.
Here is a detailed article talking about this topic:


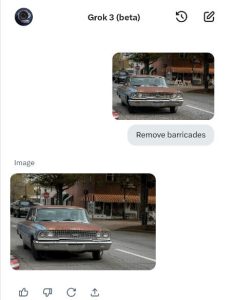
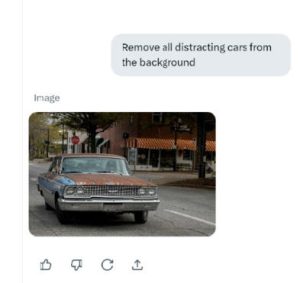
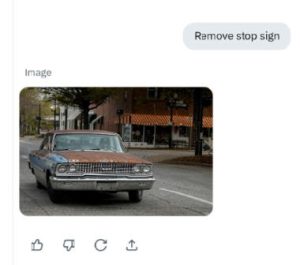


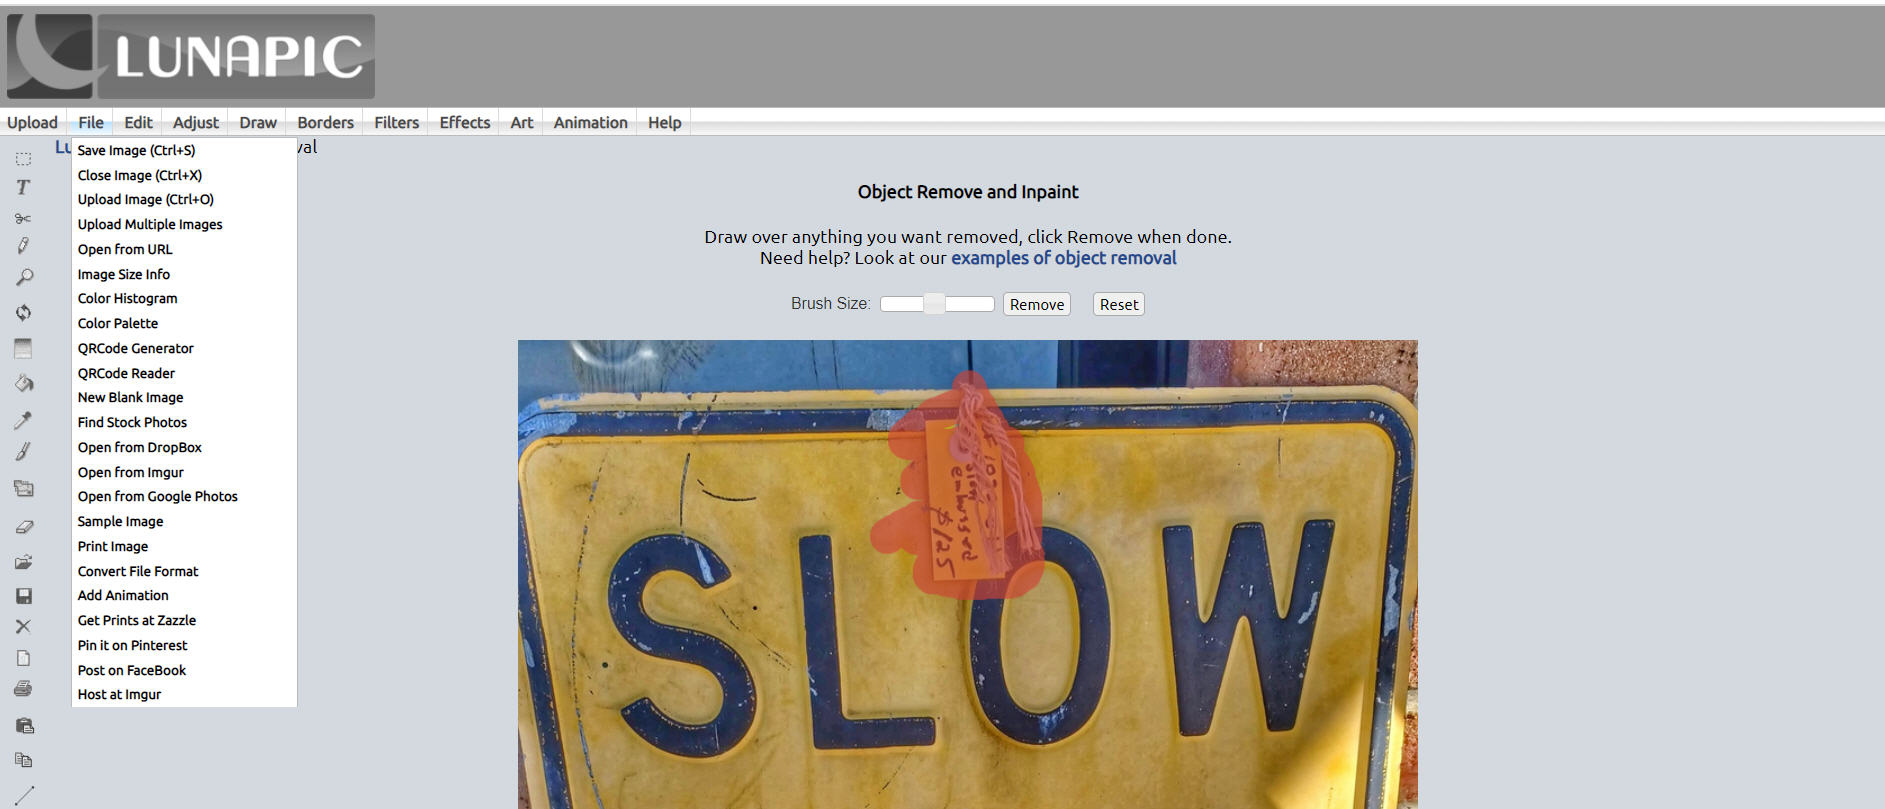
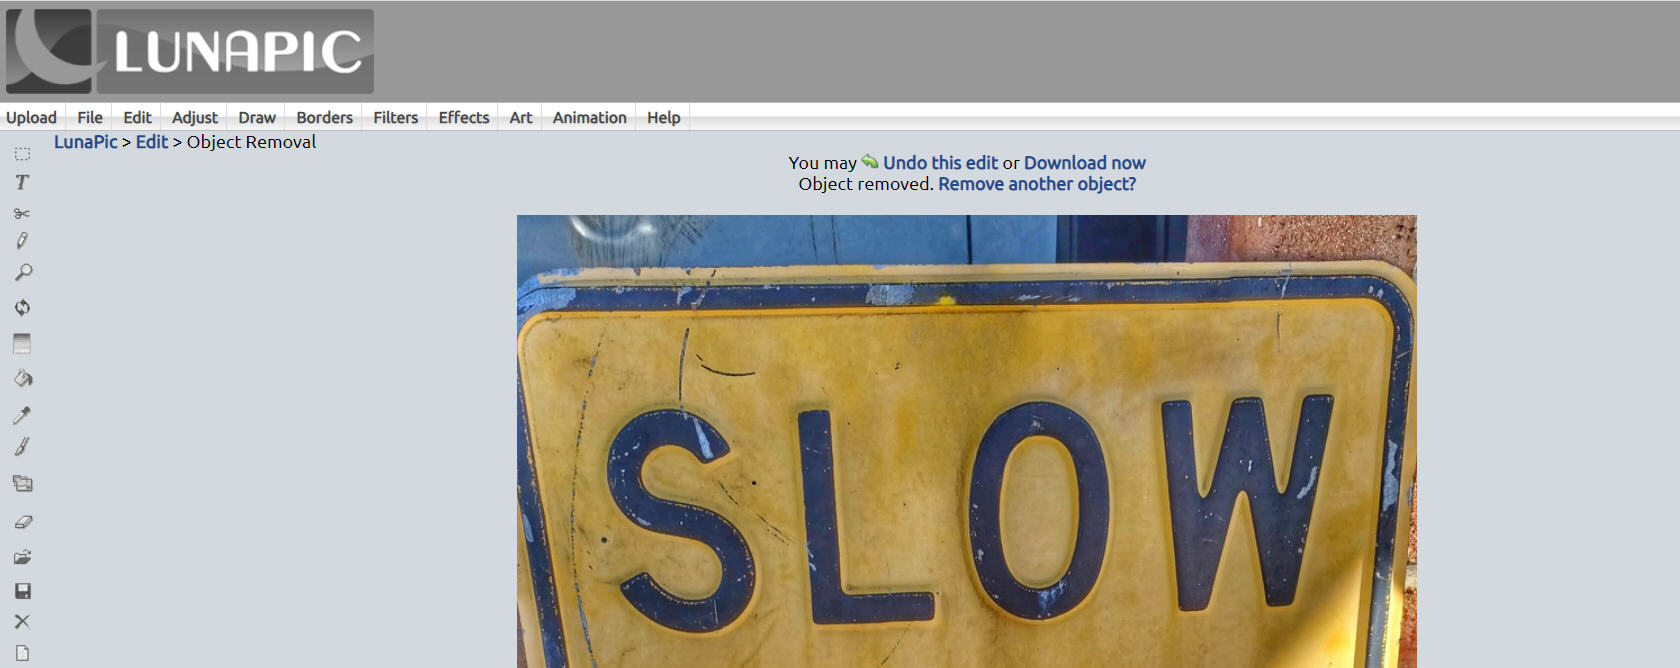
 Sometimes, when you take a photo, you see objects or imperfections you want to have removed easily and quickly. Maybe you have a beach photo and want to remove an unsightly person or object, you broke up with your ex and want him/her removed from the photo. Most if not all photo editing software tools have the healing option that comes as standard. But what if you don’t have any of these sometimes expensive photo editing programs/apps? What options do you have? I came across an online photo editor years ago, but have not used all the options to date, until the developer of this tool introduced me to their Smart Object Removal tool. At first, I thought it would be one of the healing tools that basically replace one area of your image with another area of your photo. This doesn’t work all the times as the area you want to match doesn’t fit into the area you want to remove.